Set up a 360° feedback with nominations
Your 360° feedback is ready, the questionnaire is done, the perspectives are set up. Now the feedback recipients are supposed to propose their peers themselves, the manager reviews them and you approve, before anyone is invited. This guide takes you from the first setting to the moment the first lists start running. You cannot trigger anything by accident along the way: as long as the nomination period of the edition has not begun, no list starts and nobody gets a request.
Check that the basics are in place
Nominations build on a finished 360° feedback. The perspectives have to exist, because you set up a separate path for each of them. The self-assessment is never nominated, so there is nothing to do for it.
The second prerequisite is the one people miss: the supervisor has to be filled in on the employee profiles. easyreview resolves roles such as "Supervisor" separately for every feedback recipient. Where none is on record, the list later reports "Role unfilled" and the task lands with you.
Switch nominations on
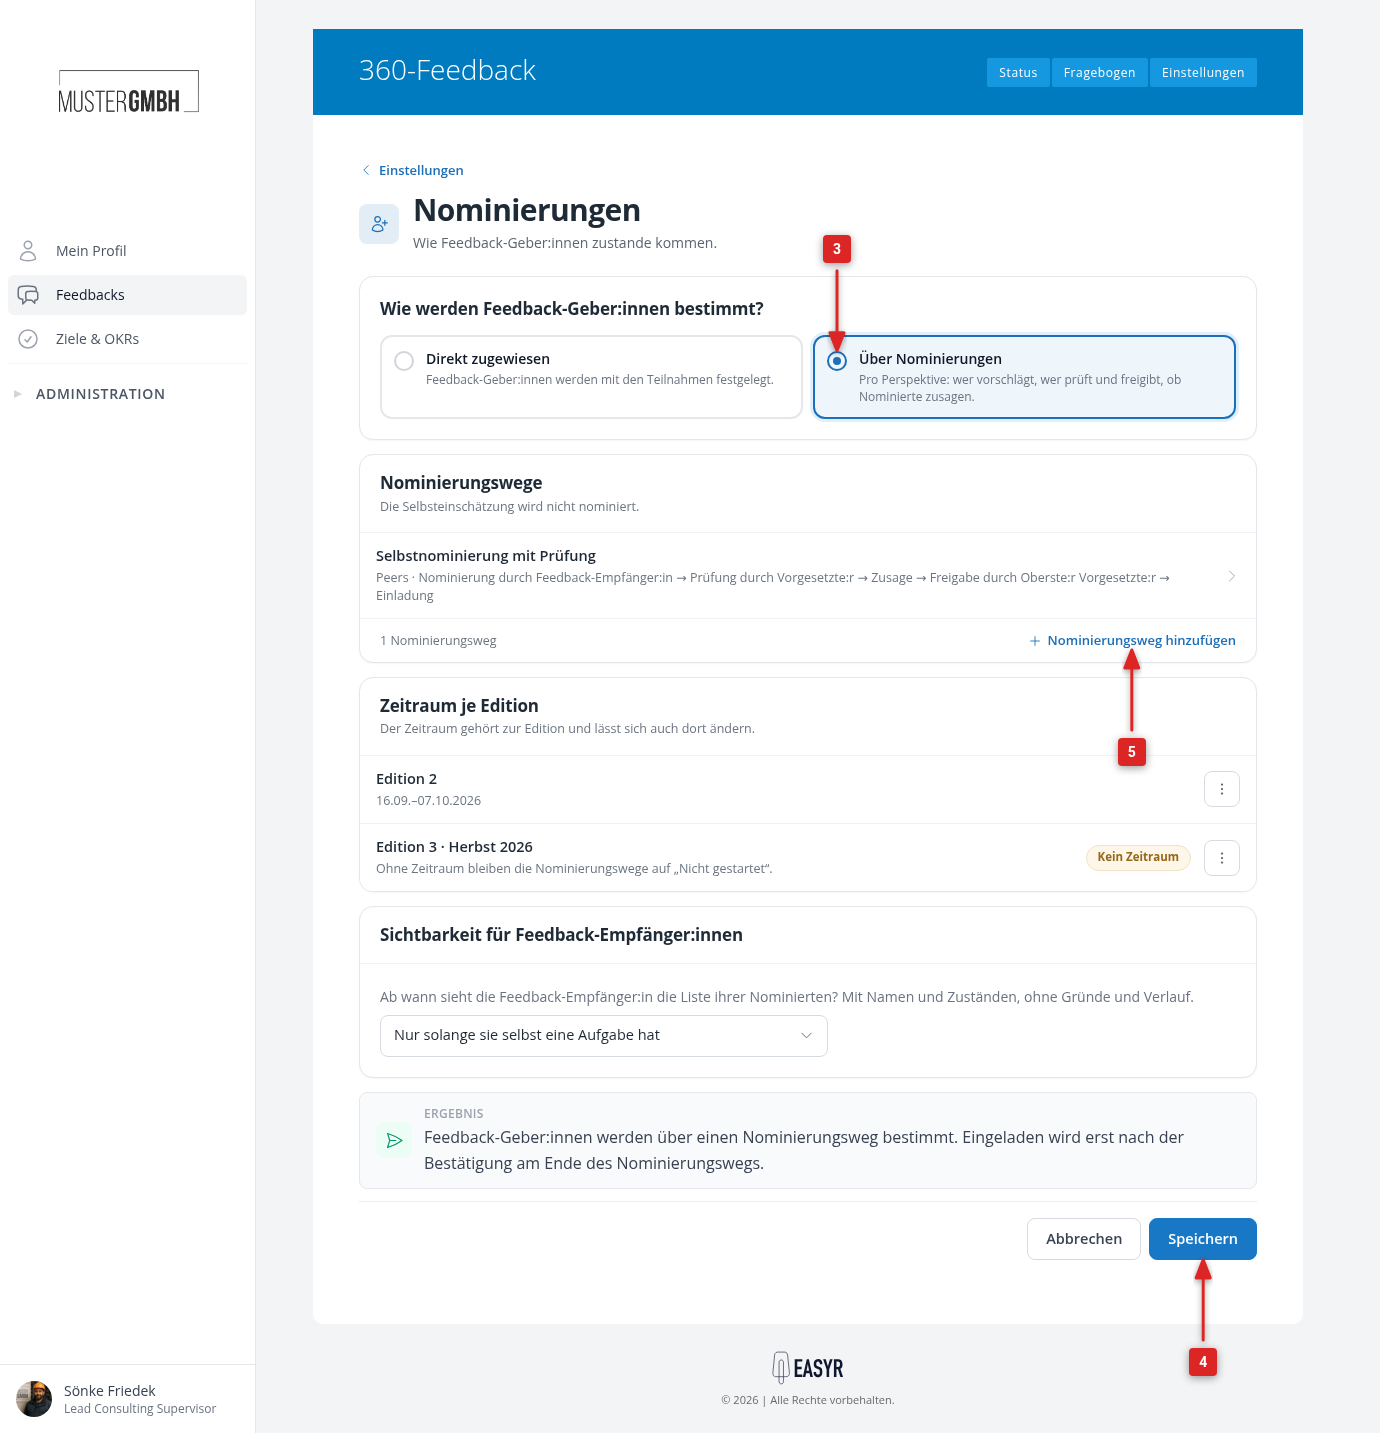
Open the settings of the feedback and click "Set up" in the "Nominations" row. Under "How are feedback providers determined?", choose "Through nominations" and click "Save" at the bottom of the page.
The same page holds the "Visibility for feedback recipients" card. This is where you decide from which point the person may read along in their own list. The preset is "Only while they have a task themselves". If you want more transparency, pick "From the start of the nomination". Reasons for declines and the history stay hidden either way.
Create the path for the peers
On the "Nominations" page, click "Add nomination path" in the "Nomination paths" card. You see one card per perspective that gives feedback. In the "Peers" card, click "Add nomination path" and assemble the path:
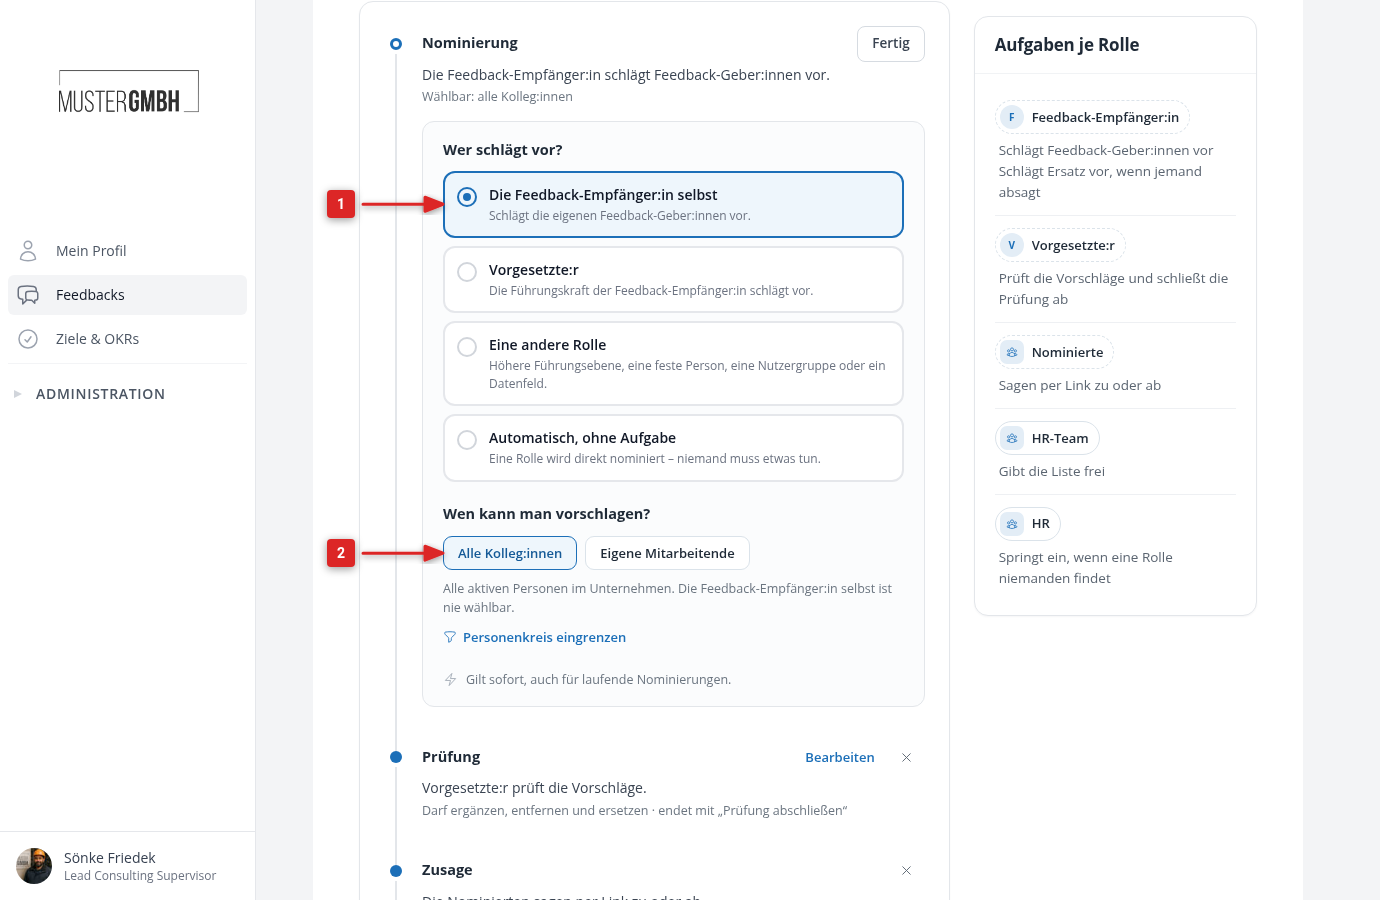
- Under "Who proposes?", choose "The feedback recipient themselves".
- Under "Who can be proposed?", take "All colleagues". If only certain people should be eligible, for example only managers, narrow down the group with "Narrow down the group of people" right below it.
- Click "Add" in the "Review" and "Acceptance" rows. The review starts with the role "Supervisor", which is what you want.
- Click "Add" in the "Approval" row as well. Add yourself as a fixed person or a user group there with "Role", and remove "Supervisor" with the x.
- easyreview suggests a name above the editor that matches the nomination you picked. The pencil next to it lets you choose your own. Then click "Save" in the top right.
Each step says in one sentence what it does, and "Tasks per role" on the right lists who gets which task. Read both before you save. You then see straight away whether the path runs the way you mean it to.
Set the minimum and maximum, add the other paths
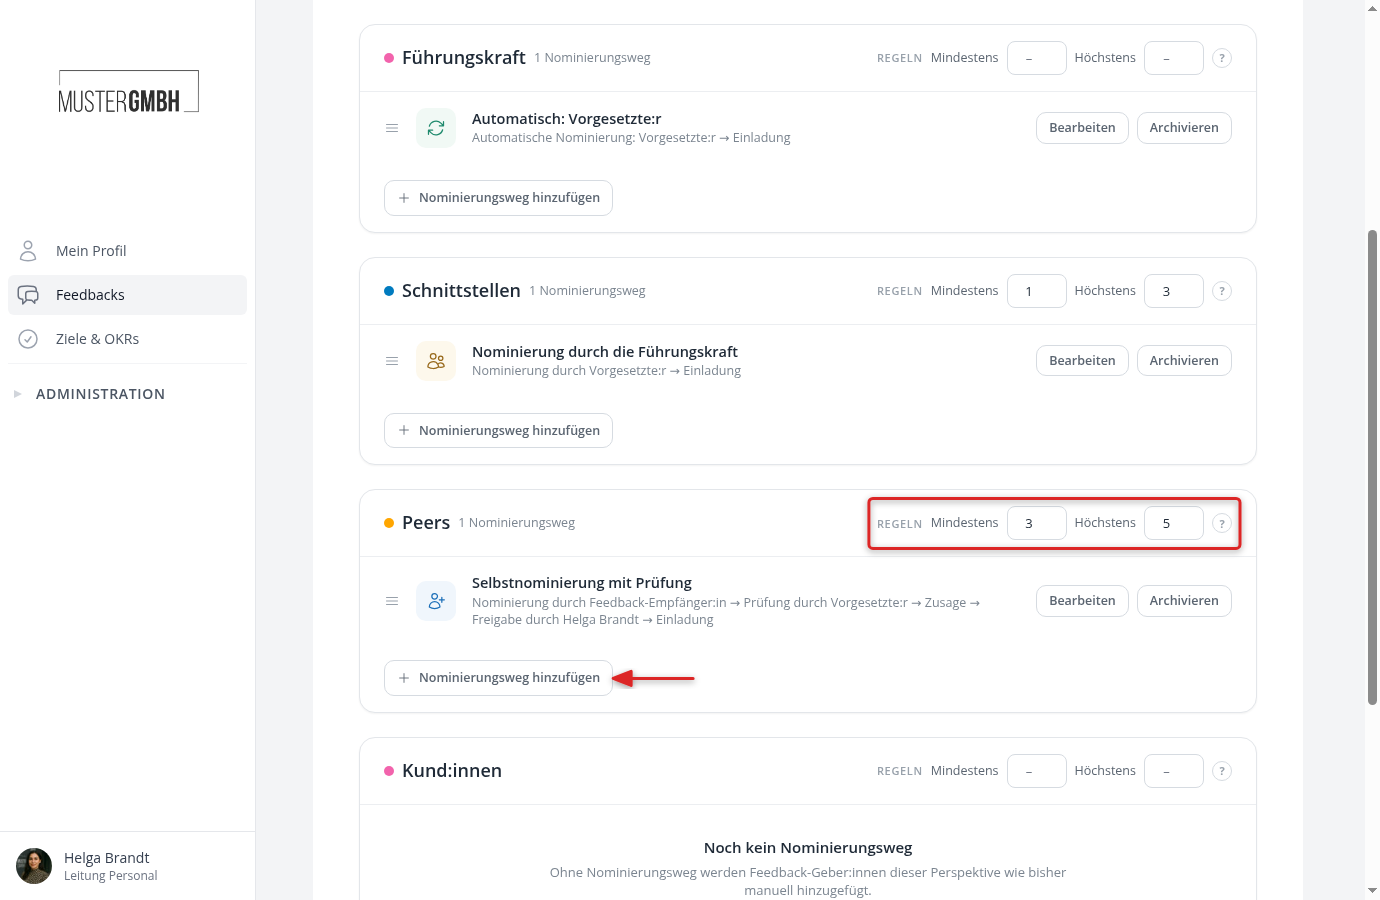
Back in the overview, the fields "At least" and "At most" sit under "Rules" in the top right of every perspective card. For the peers, enter 3 and 5 for example. The fields save as soon as you leave them. The maximum applies immediately, the minimum at the end: if it is not reached, the approval waits and nobody is invited.
The other perspectives get by with shorter paths. For the manager, "Automatic, no task" with the role "Supervisor" is enough, with no review, acceptance or approval. The interfaces are usually named by the manager, again without further stages. Set a minimum on a path that short, otherwise the list is closed after the first person proposed. If a perspective allows external feedback providers, such as customers, untick "Employees" and tick "External people" under "Who can be proposed?" in its path. The nominators then enter a name and email address, and easyreview contacts the people by email. Perspectives without a path stay as they are: you keep entering their feedback providers yourself.
Set the nomination period of the edition
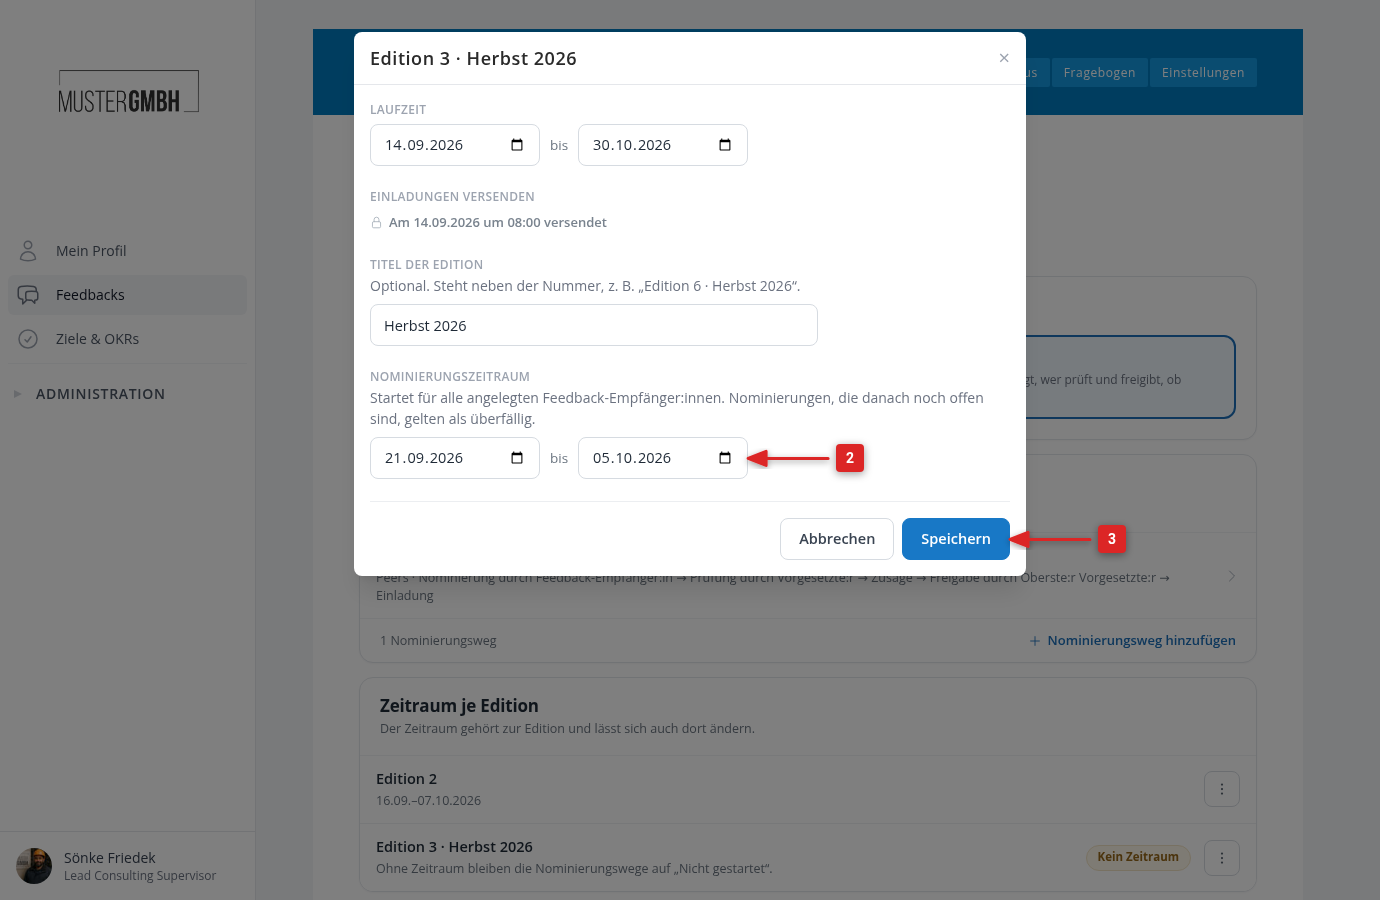
Nominations do not start on their own. On the "Nominations" page, click the ⋮ menu next to the edition in the "Period per edition" card and choose "Edit". In the dialog, enter start and end under "Nomination period" and click "Save". When you create a new edition, the field is not there yet. Add the period once the edition exists.
Look at "Send invitations" in the same dialog. If that date falls on the day the period ends or before it, easyreview warns below the nomination period: nominations that are not confirmed by then will not be invited automatically. Put the invitation date after the end of the nomination period and the invitation catches everybody.
Walk through the emails once
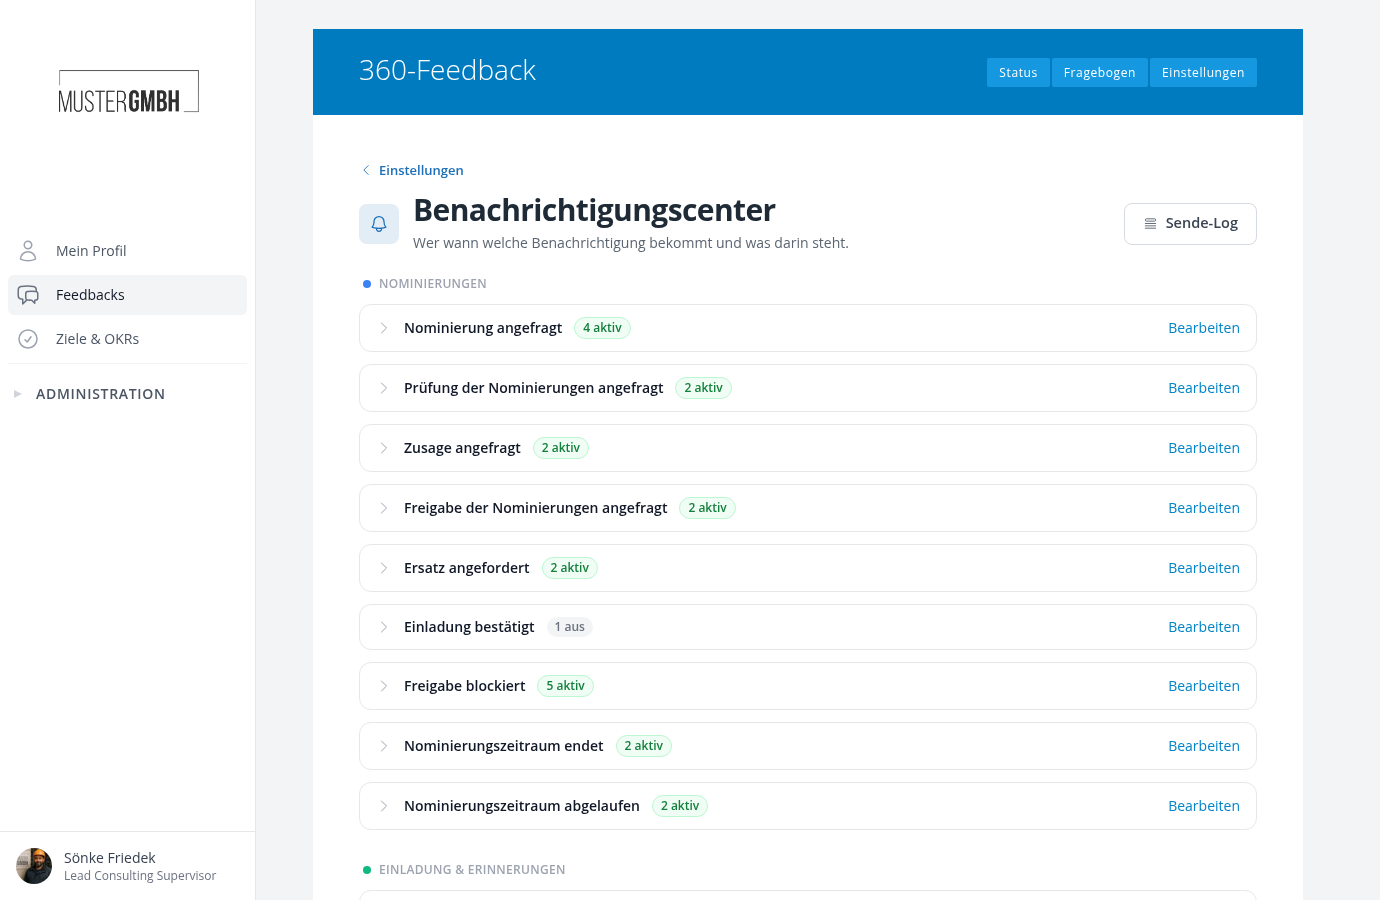
Switching nominations on created nine notification types with 22 rules, all active except one. There is nothing to set up. A walkthrough still pays off: open the settings and click "Edit" in the "E-mails" row. The "Nominations" group sits at the very top.
Three things are worth a look. For five of the types, every request appears twice, once for a person's own list and once for another person's list. Which one applies is controlled by "Applies to" in the Settings tab. In the same tab, "Send as digest" collects several notifications into one email, which matters most for the approval request, when twenty lists land with you at the same time. And only "Nomination requested", "Acceptance requested" and "Approval blocked" come with a reminder, each after 7 days.
Add the feedback recipients to the edition
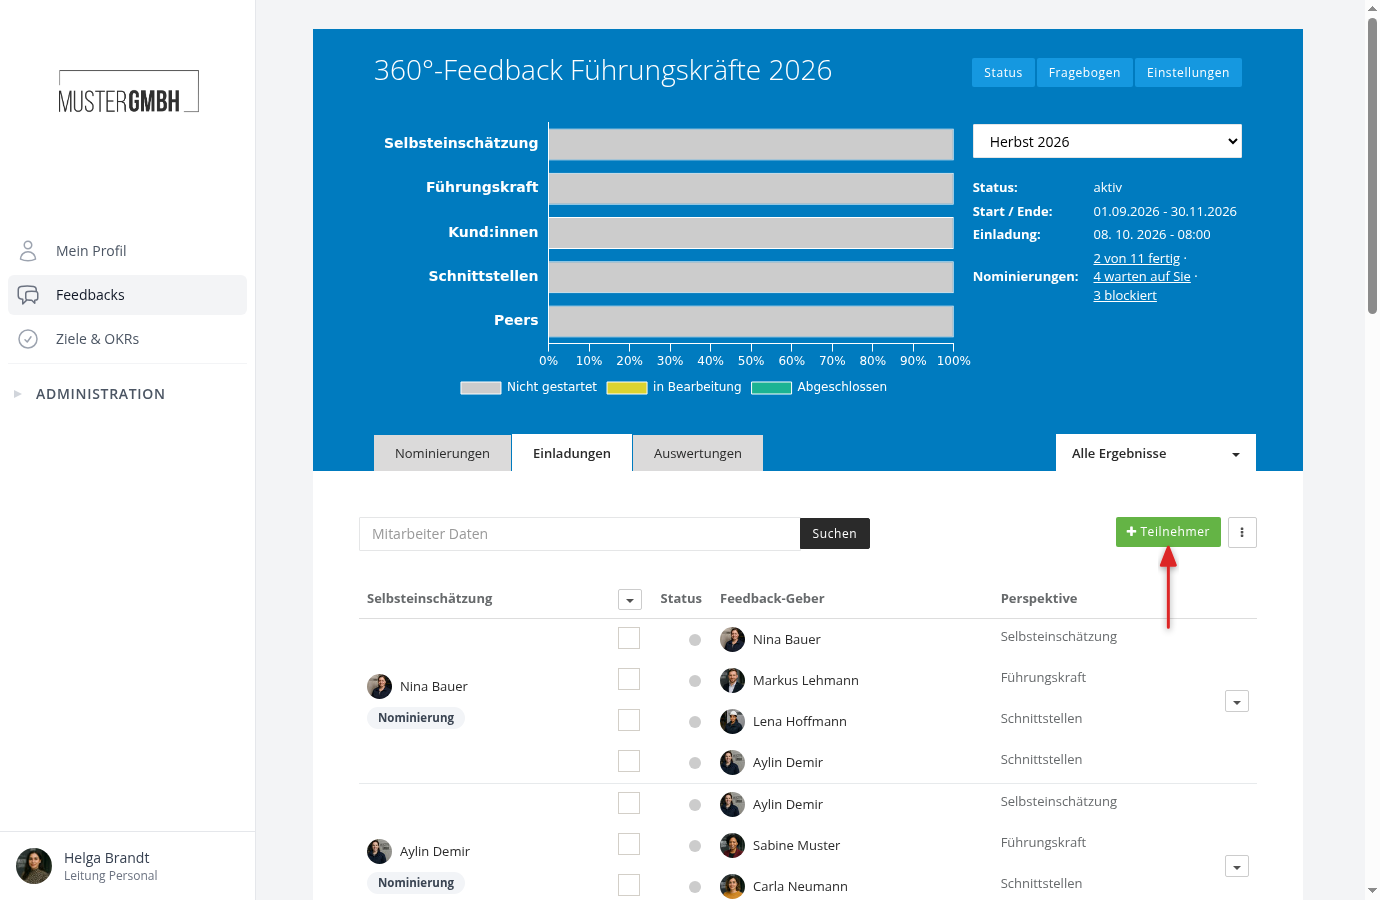
Nominations run per feedback recipient, so the edition needs those people first. Open the status page of the edition, stay in the "Invitations" tab and click "+ Participant" above the participant list. Click the person's row, then "Save & close" without picking any feedback provider. For many people at once, "Invite many participants" in the ⋮ menu next to "+ Participant" is faster. Set every perspective with a nomination path to "Do not assign" there. As long as the nomination period has not started, nothing happens. For anyone you add later, the nomination starts right away.
Only enter feedback providers here for perspectives that have no nomination path. The manager joins through the automatic path, the peers through the nomination. They only show up in the participant list once their list closes with "Invitation confirmed". Until then the link "Nomination" sits under the name of the feedback recipient. Anyone you enter by hand counts towards the minimum and maximum of their perspective.
Check the start on day one
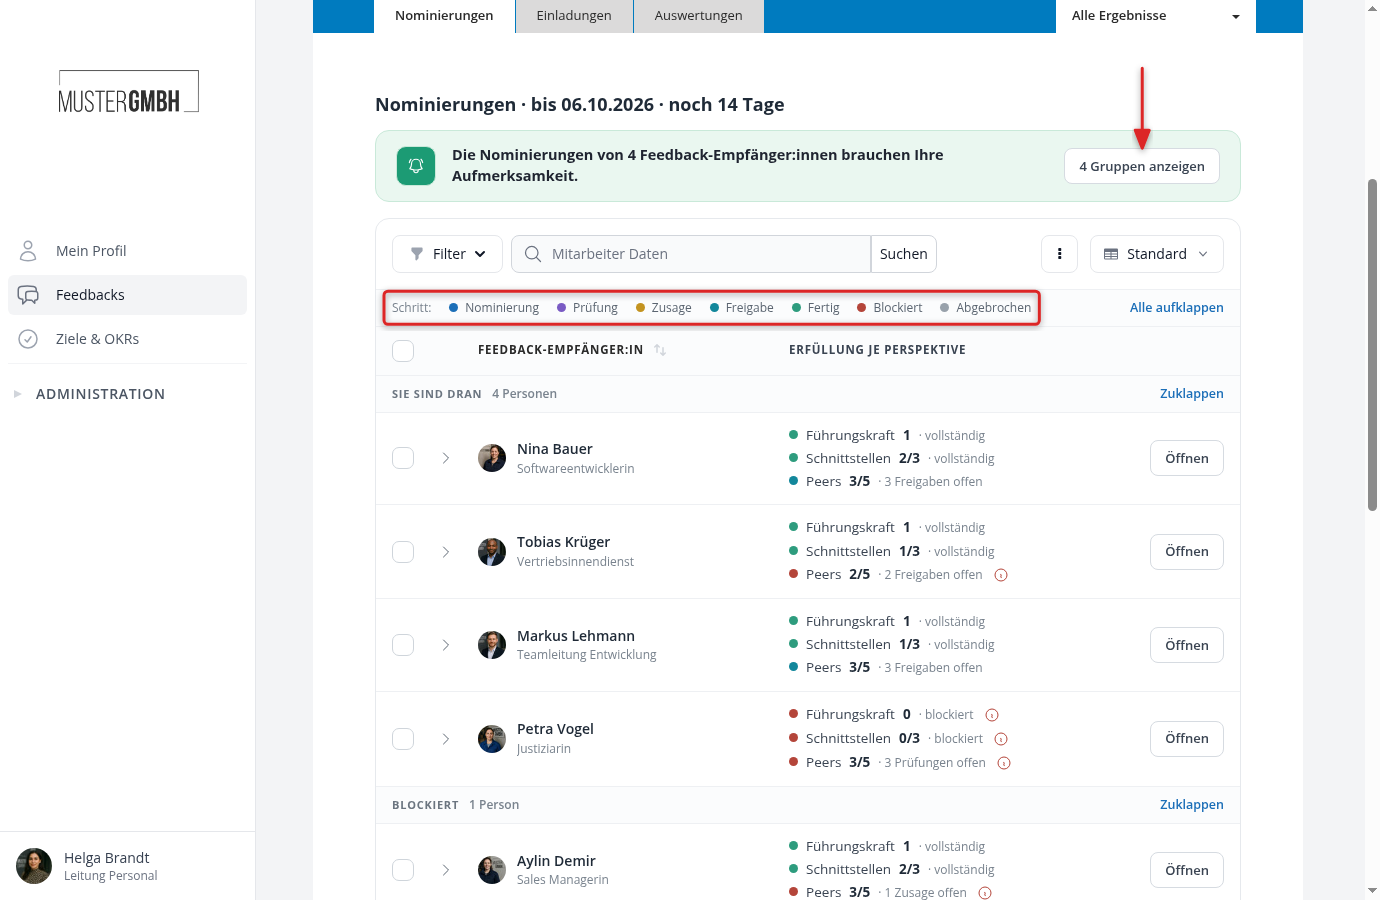
On the first day of the nomination period the lists start by themselves and the first requests go out. Open the status page of the edition and the "Nominations" tab, which sits to the left of the "Invitations" tab.
Every person should now be in the "Running" or "Your turn" group, with a line such as "Peers 0/5 · nomination open" in the "Fulfillment per perspective" column. Red dots on day one almost always mean "Role unfilled", so a supervisor is missing from the profile. One click on the info icon opens "Why blocked?" with the reason.
The people involved do the rest from here, and Nominate, review and accept describes their side of it. How you accompany the lists from now on, until every feedback provider is settled, is covered by the guide Accompany nominations until the invitation.
Reached the end?
Done – guide completed!
Check off the steps as you work through them. Your progress is shown on the left.
You have completed every step.