Employee list
The employee list is your central page for all master data. You add new people here, invite them to the system, keep their data current and find any record again. Open it from the sidebar under Administration > Employees.
The area is available to you if you have HR rights, administrator rights or executive rights. Without them, the entry does not appear in the sidebar.
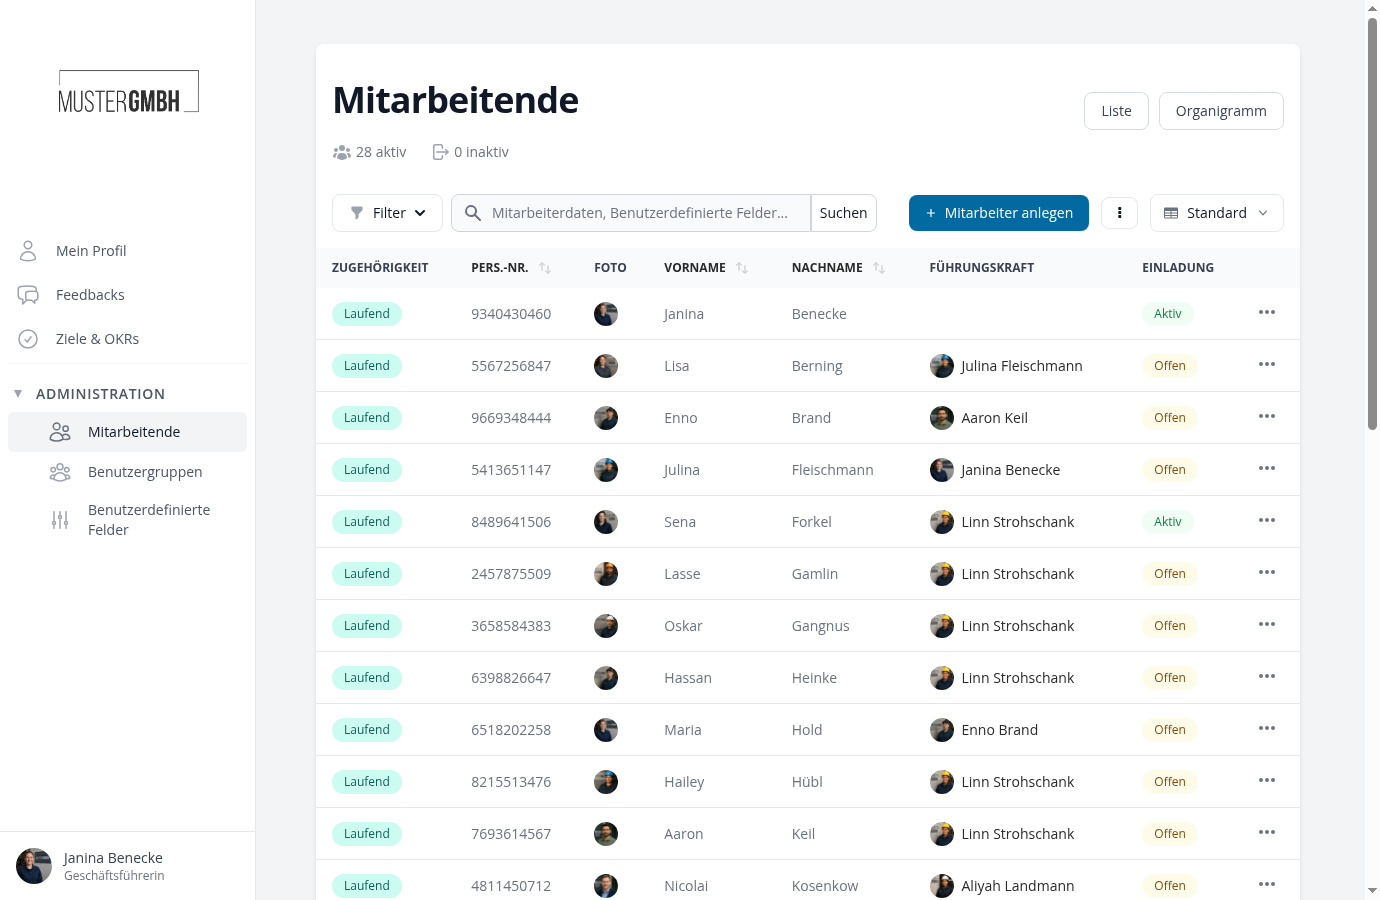
What the page tells you at a glance
Below the heading you see two numbers: how many employees are active and how many are inactive. Inactive means an exit date lies in the past. Both numbers always cover the whole company, no matter what you are currently searching or filtering for.
By default the table shows employment status, staff number, photo, first name, last name, supervisor and invitation status.
Two columns are worth explaining:
Employment Status tells you where someone stands in their employment. Active means no end date is set. Pending exit means an exit date is stored but still lies in the future. Terminated means that date has passed.
Invitation tells you how far along someone is with their access. Open means the person has never been invited. Invited means the login details went out but have not been used yet. Active means the person has already signed in. No email means no address is stored that an invitation could go to.
Finding a specific person
For the quick case, type the name into the search field and click Search. The search covers master data and your custom fields, so you can also find people by staff number or department.
When you are not looking for one person but narrowing down a group, click Filters. There you assemble conditions, for example everyone reporting to a particular supervisor or everyone with an exit date set. Several filter rows apply together, so a person has to match all of them.
Adding employees
For individual people, click Add employee in the control row and fill in the form.
When you are entering many people at once, for instance before go-live, use the import instead. You find it in the menu behind the three dots under Import. There you upload a file and map its columns to the fields in easyreview.
Sending out access credentials
You invite individual people through the row actions, see the next section.
For many at once, open the menu behind the three dots. It offers two routes:
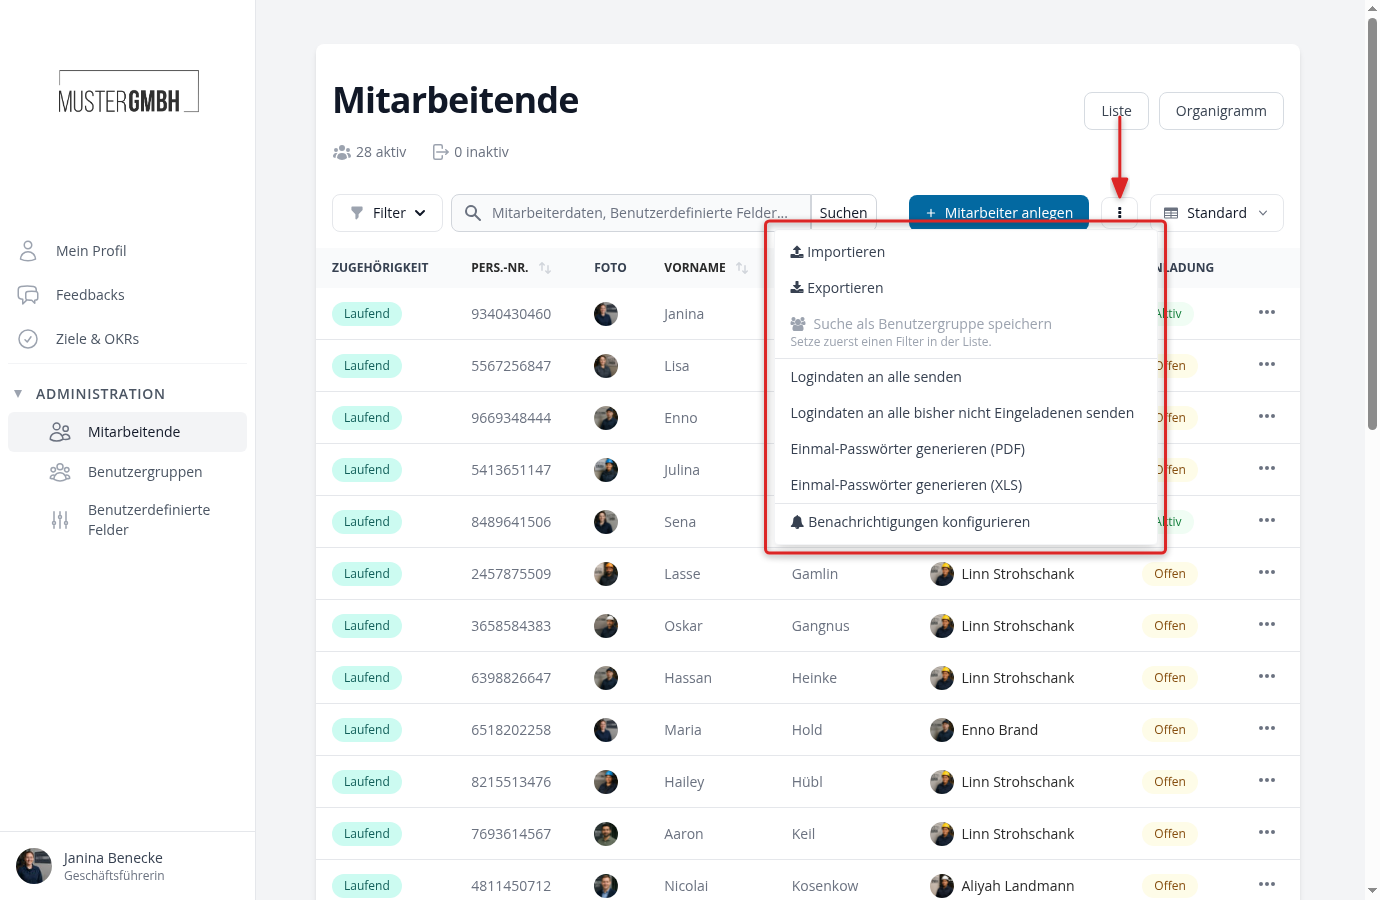
Send invitation (all employees) sends an invitation to everyone with an email address, including people already invited. Send invitation (uninvited employees) skips everyone who has already received one. The second route is the right one when you only want to reach the new people after an import.
For employees without an email address there is Generate Start-Passwords, as PDF or as XLS. You get a list of credentials you can print or hand out another way.
What you can do per person
At the far right of every row, a click opens the actions for that person.
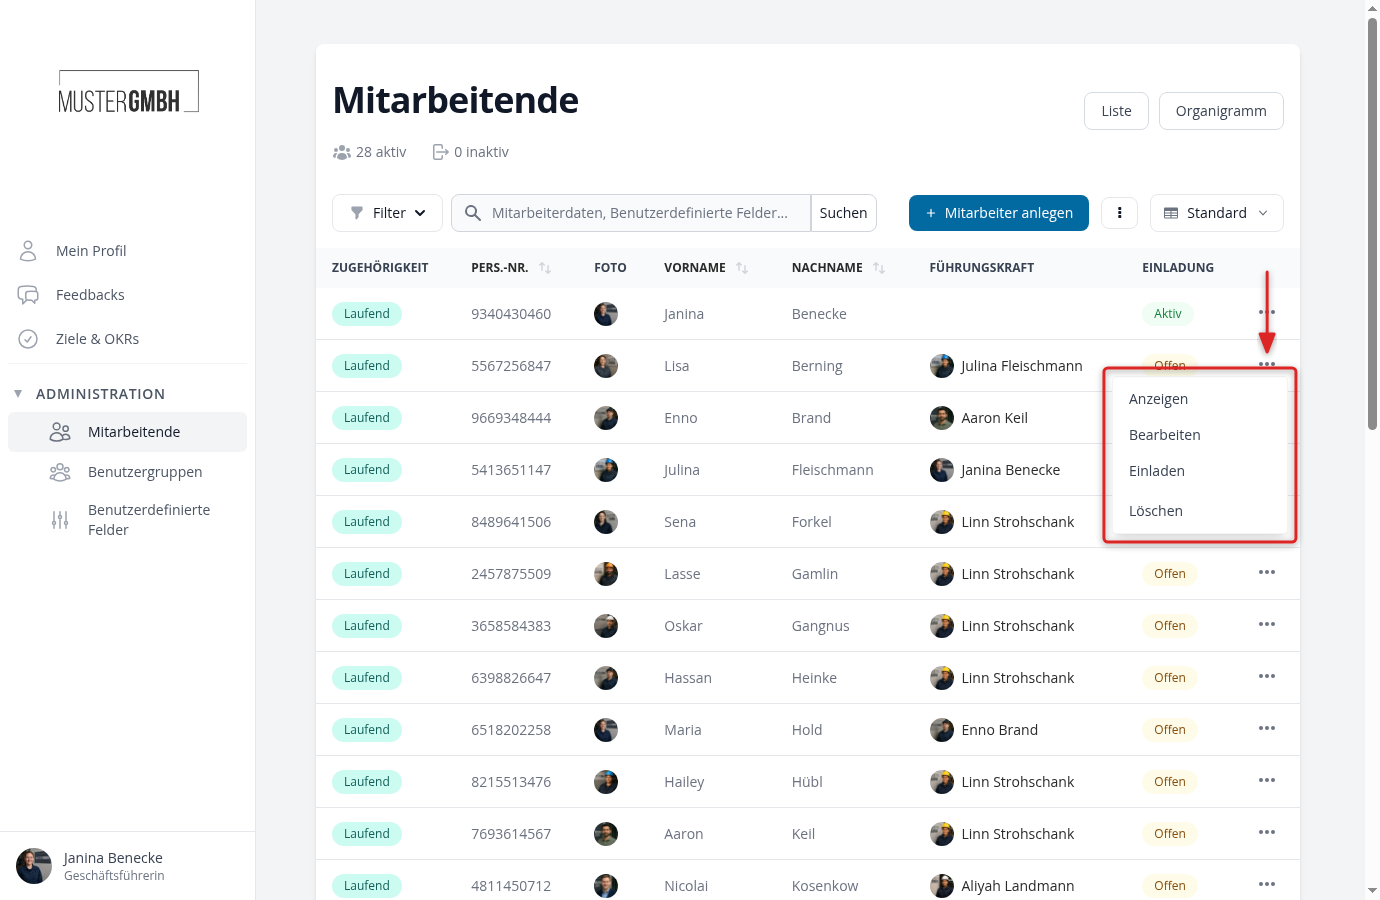
Show opens the employee profile with feedbacks, target agreements and team. Edit opens the master data. Invite sends the login details to exactly this person. Delete removes the record.
On your own record, Invite and Delete are missing.
Adjusting the columns
To the right of the menu with the three dots you see the name of your current view, Standard by default. Clicking it shows your saved views and Edit columns.
There you assemble which columns the table shows, for example position, email, language or your custom fields. The view applies to you only, your colleagues keep seeing their own.
Export in the menu behind the three dots downloads the list as an Excel file, with exactly the columns of your current view and any filters applied.
Looking at the organizational structure
At the top right you switch between List and Org chart. The list is the table where you maintain data. The org chart shows the same people as a hierarchy, drawn from the supervisor field.
If somebody hangs in the wrong place there, do not correct it in the org chart but here in the list, through Edit in the supervisor field.