Create a target agreement
In easyreview you create target agreements through a three-step wizard. This article walks you through each step: choose the recipient, set up the target agreement, and save.
Before you start
Before you can create a target agreement, a target agreement process with at least one active edition must exist.
Step-by-step
Step 1: Choose the recipient
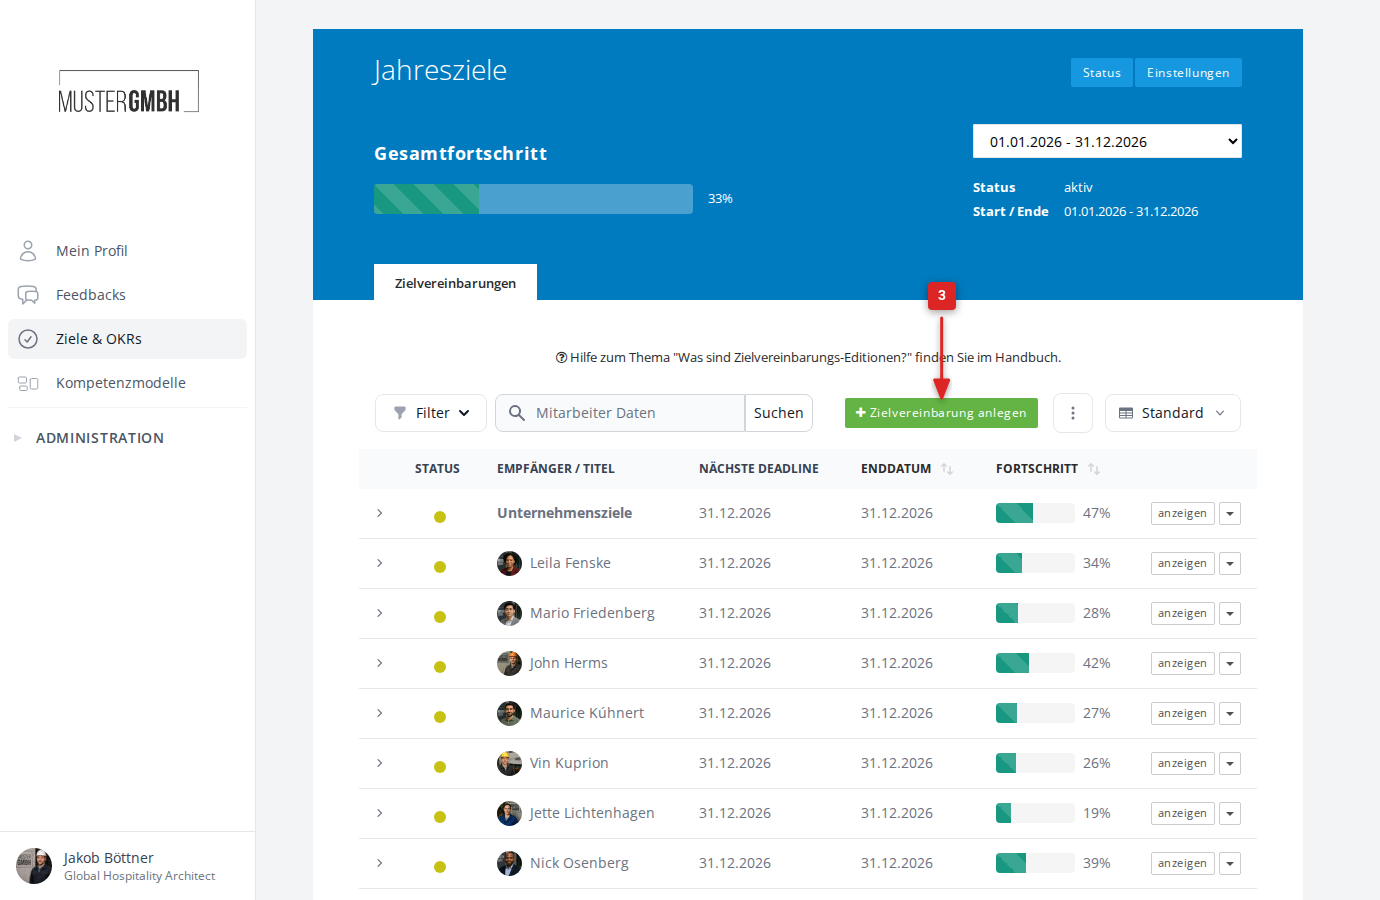
- Click Objectives in the sidebar.
- Open the process you want (for example “Annual goals”).
- Click the + Add objective button.
- The wizard opens on step 01 Choose recipient. Click the Recipient field and select the employee you want to create the target agreement for.
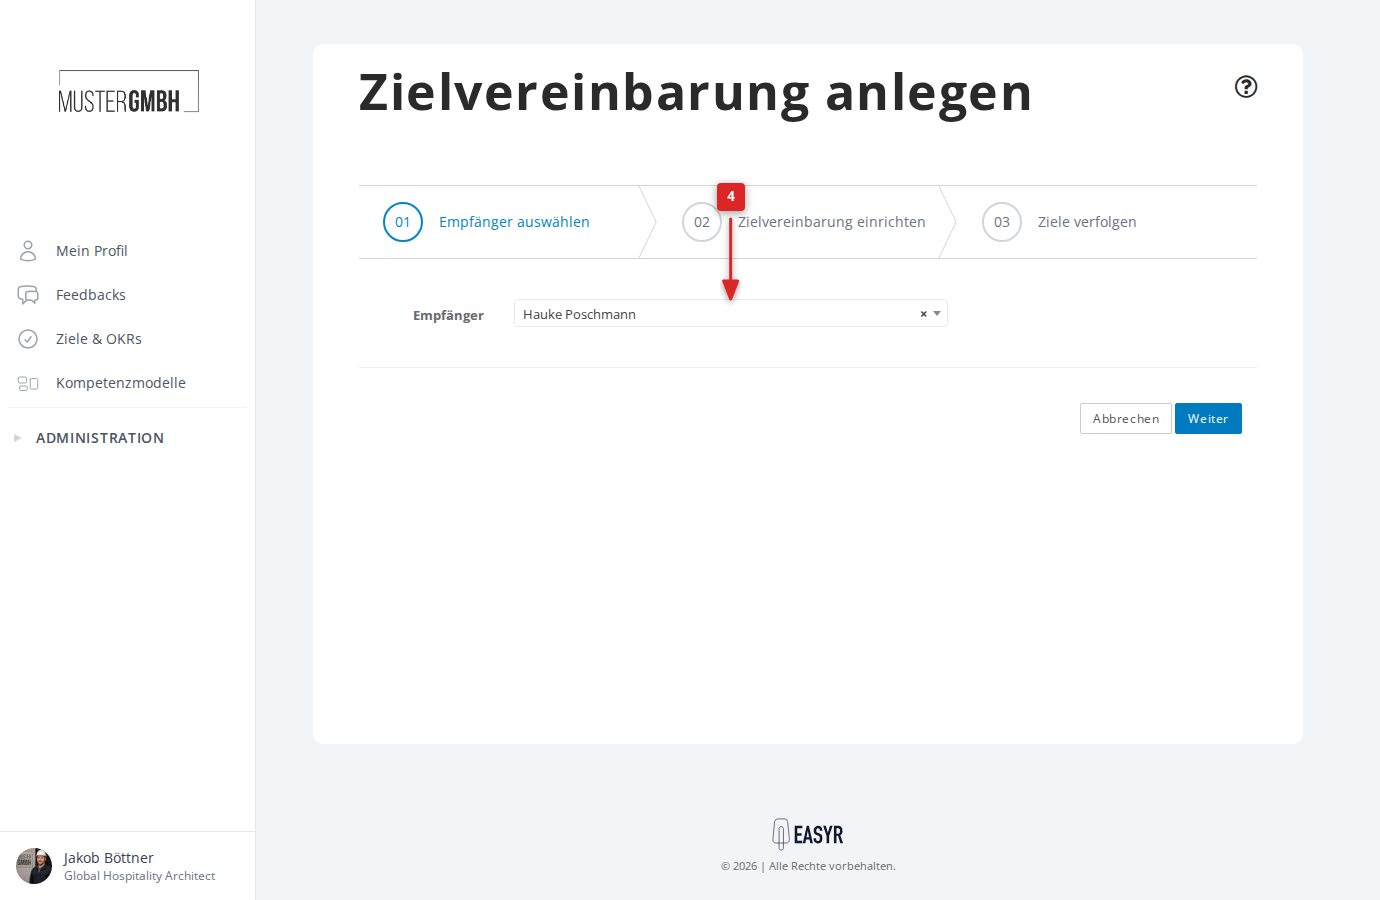
- Click Continue to move to step 2.
Step 2: Set up the target agreement
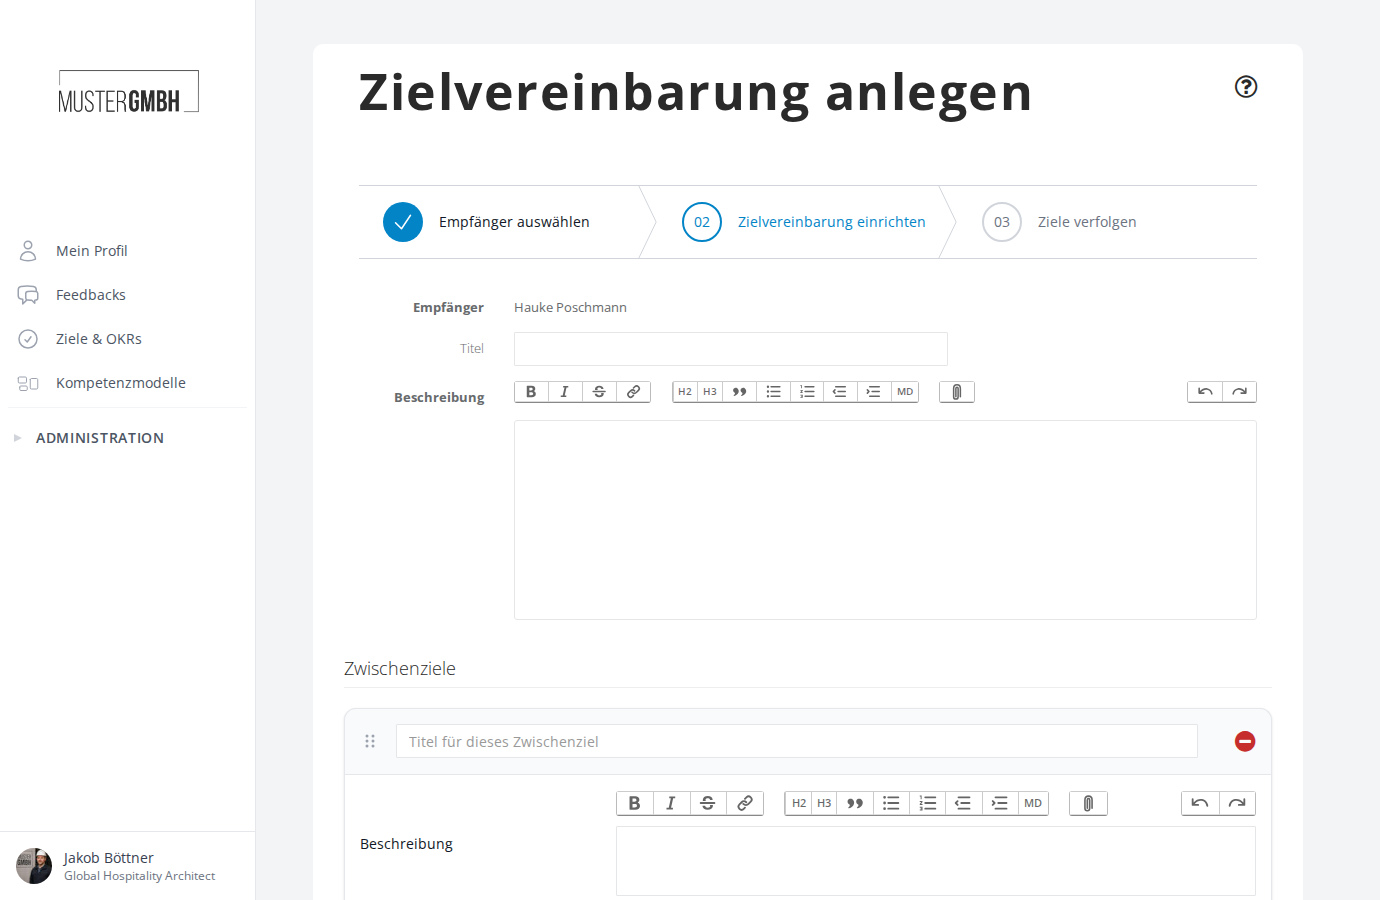
After choosing the recipient you reach the 02 Setup objectives form. The selected recipient is shown at the top of the form.
Title and description
- Optionally enter a title for the target agreement.
- Optionally enter a description. The rich text editor offers formatting such as bold, italics, headings, lists, and links.
Set up intermediate goals
Below the description you find the Intermediate Goals area. Here you define the individual goals within the target agreement.
If the process uses goal groups, the area is split into one section per group, for example professional goals, team goals, and development goals. The header of every section counts the goals and, for weighted groups, shows the share of the overall goal achievement. Every section holds as many empty goal cards as HR has preset for the group.
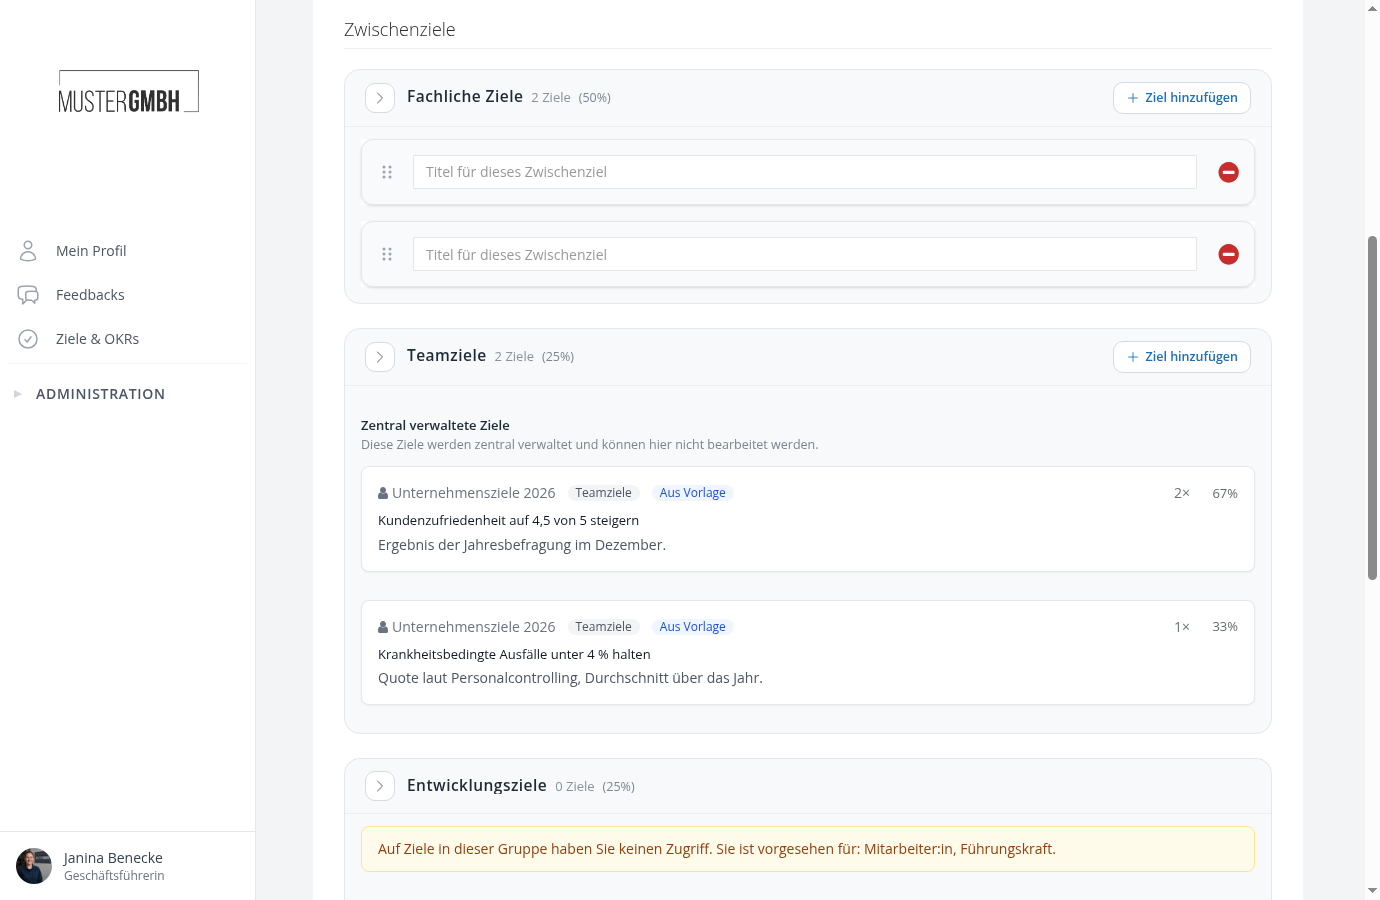
- Sections with the note “You have no access to goals in this group” are intended for other roles. You cannot create goals there.
- Goals marked From template come from a centrally managed template. They are linked automatically when saving and count towards the rules of the group.
- Every group has a minimum and maximum number of goals, plus total limits for the whole target agreement. If a section violates them, the target agreement cannot be saved and the message names the affected group.
Without goal groups, the area shows a plain list of goal cards.
Fill in a goal card
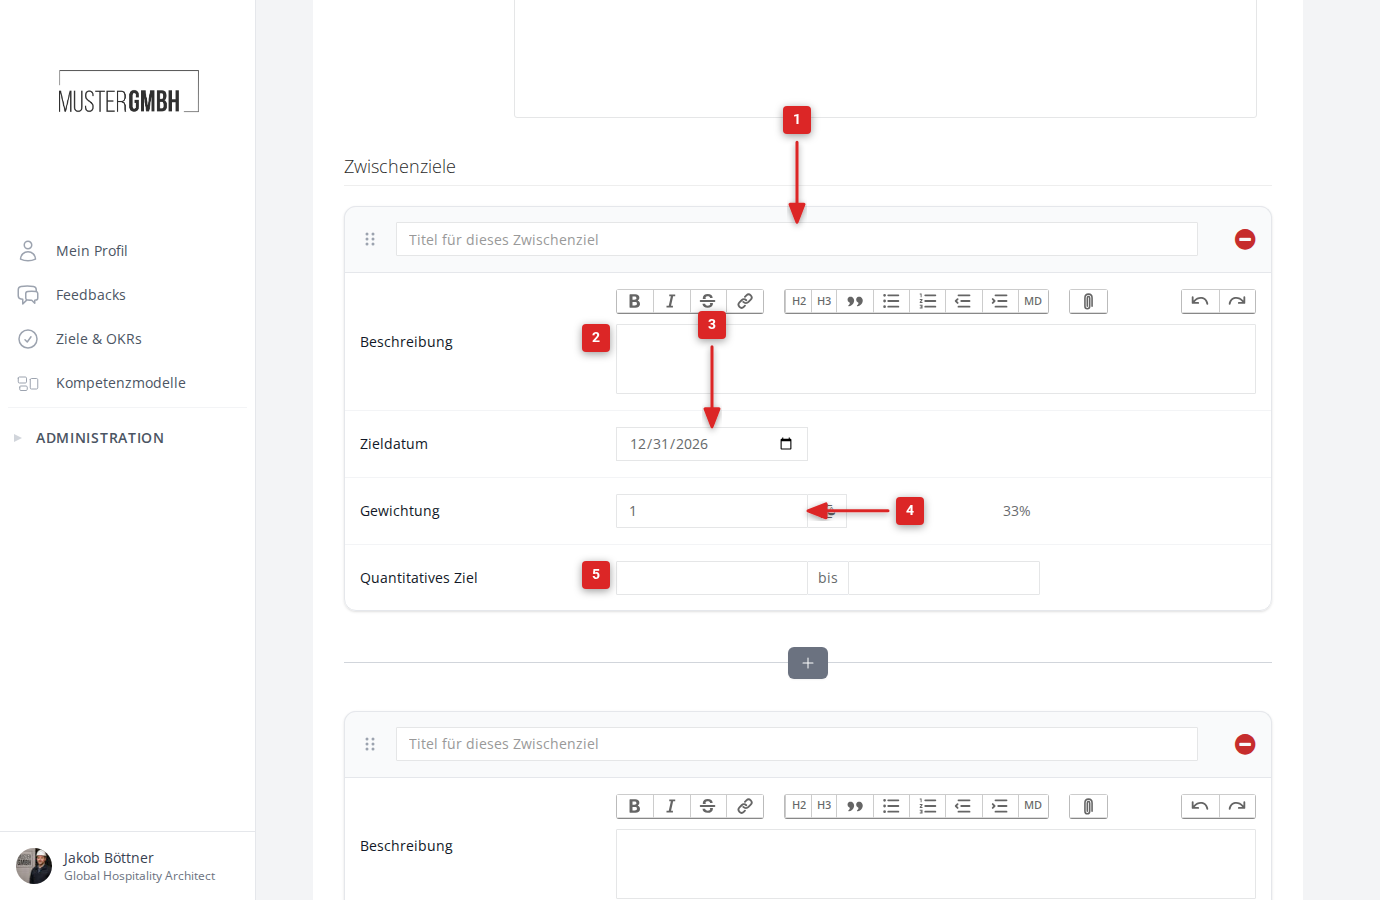
Each intermediate goal offers these fields:
- Title (required): enter a concise label for the intermediate goal.
- Description: optionally add a detailed description via the rich text editor.
- Due date: the date by which the intermediate goal should be reached. By default this is the end date of the edition.
- Weighting: set how much this goal counts within its group. The percentage on the right shows its share within the group. See Weighted intermediate goals for details.
- Quantified Target: optionally give a number range (from/to) to make progress measurable. Whether the field appears and whether you may choose the values freely depends on the rules of the group. See Quantified intermediate goals for details.
Add, remove, and move intermediate goals
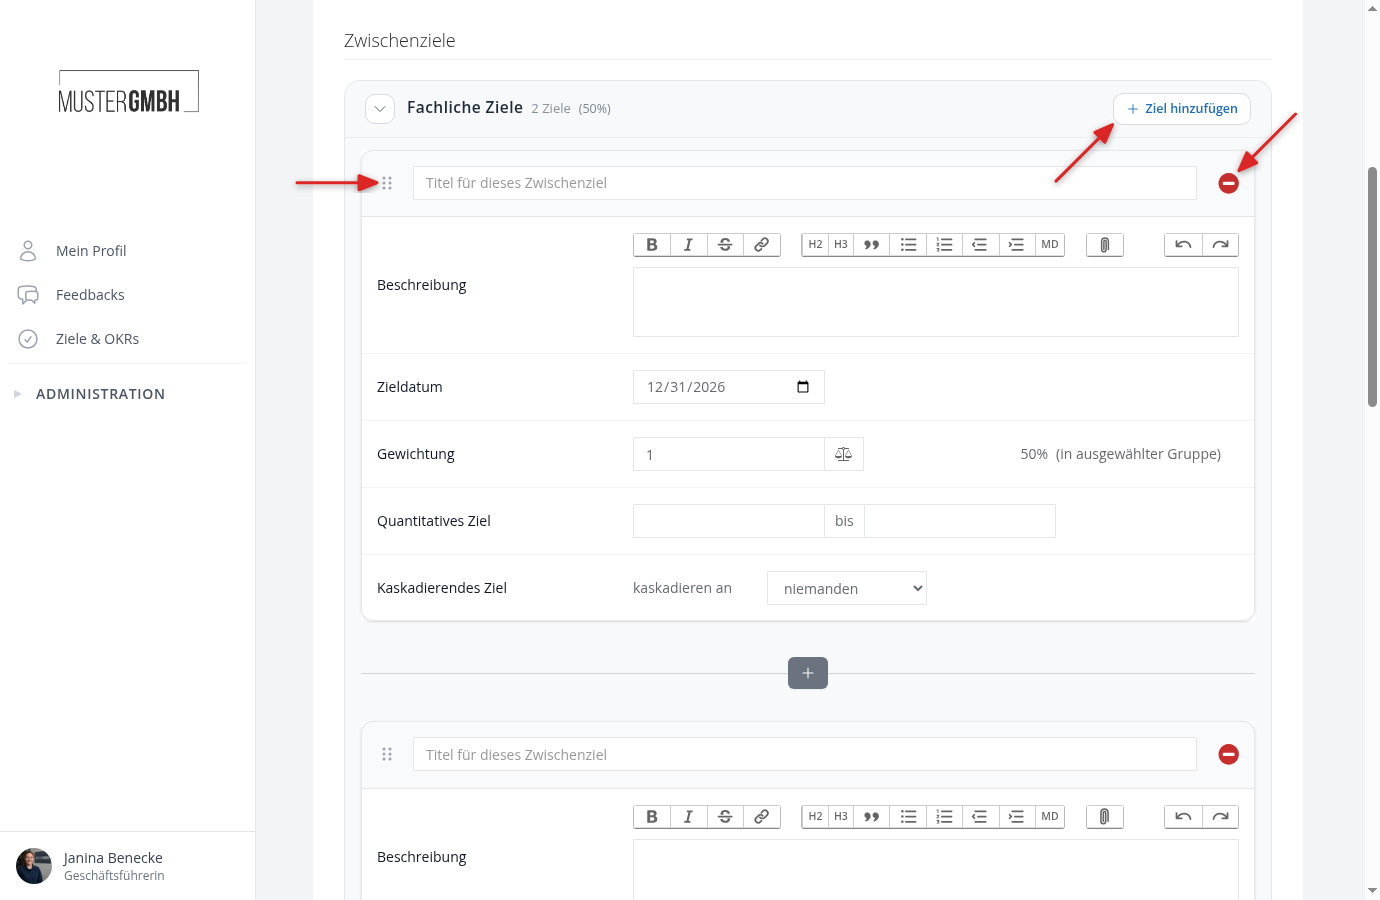
- To add a new intermediate goal, click Add goal in the section header or the + icon between two existing goals.
- To remove an intermediate goal, click the red − icon in the top right corner of its card.
- To reorder intermediate goals, drag the handle icon (six dots) to the left of the title. Drag a goal into another section to change its group.
Link cascaded goals
If cascaded goals from higher-level target agreements are available for the edition, the Cascaded Goals area appears. Click Pick cascaded objectives to link existing goals from other target agreements.
See What are cascaded goals? for details.
Settings
In the Settings area at the bottom of the form you configure the overarching options of the target agreement.
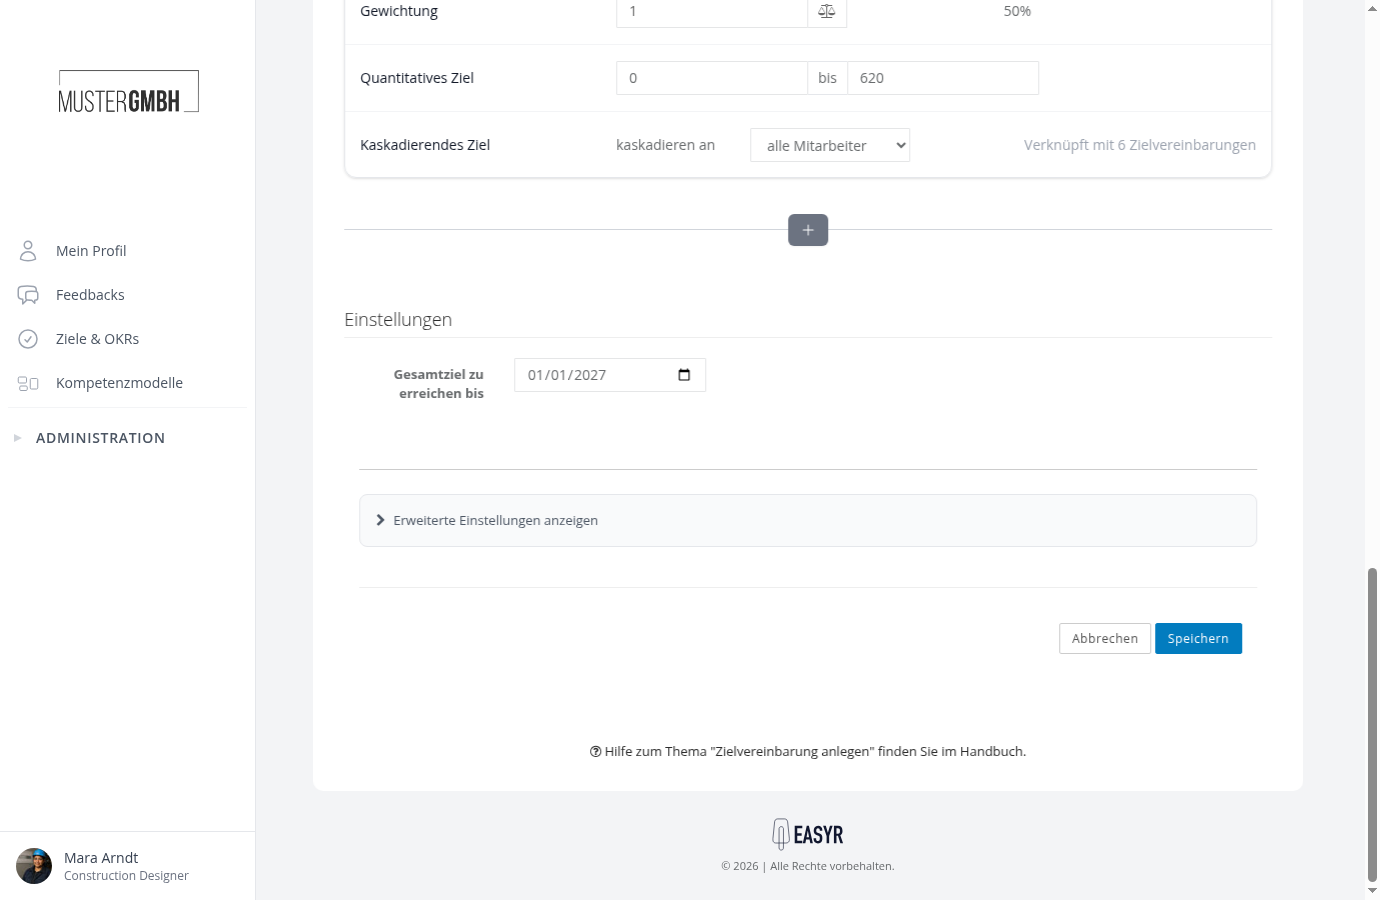
- Overall Goal to be Achieved By: the target date for the whole target agreement. By default this is the end date of the edition.
The Show advanced settings area below is meant for HR: this is where a target agreement becomes a template.
Save the target agreement
- Review everything you entered.
- Click Save.
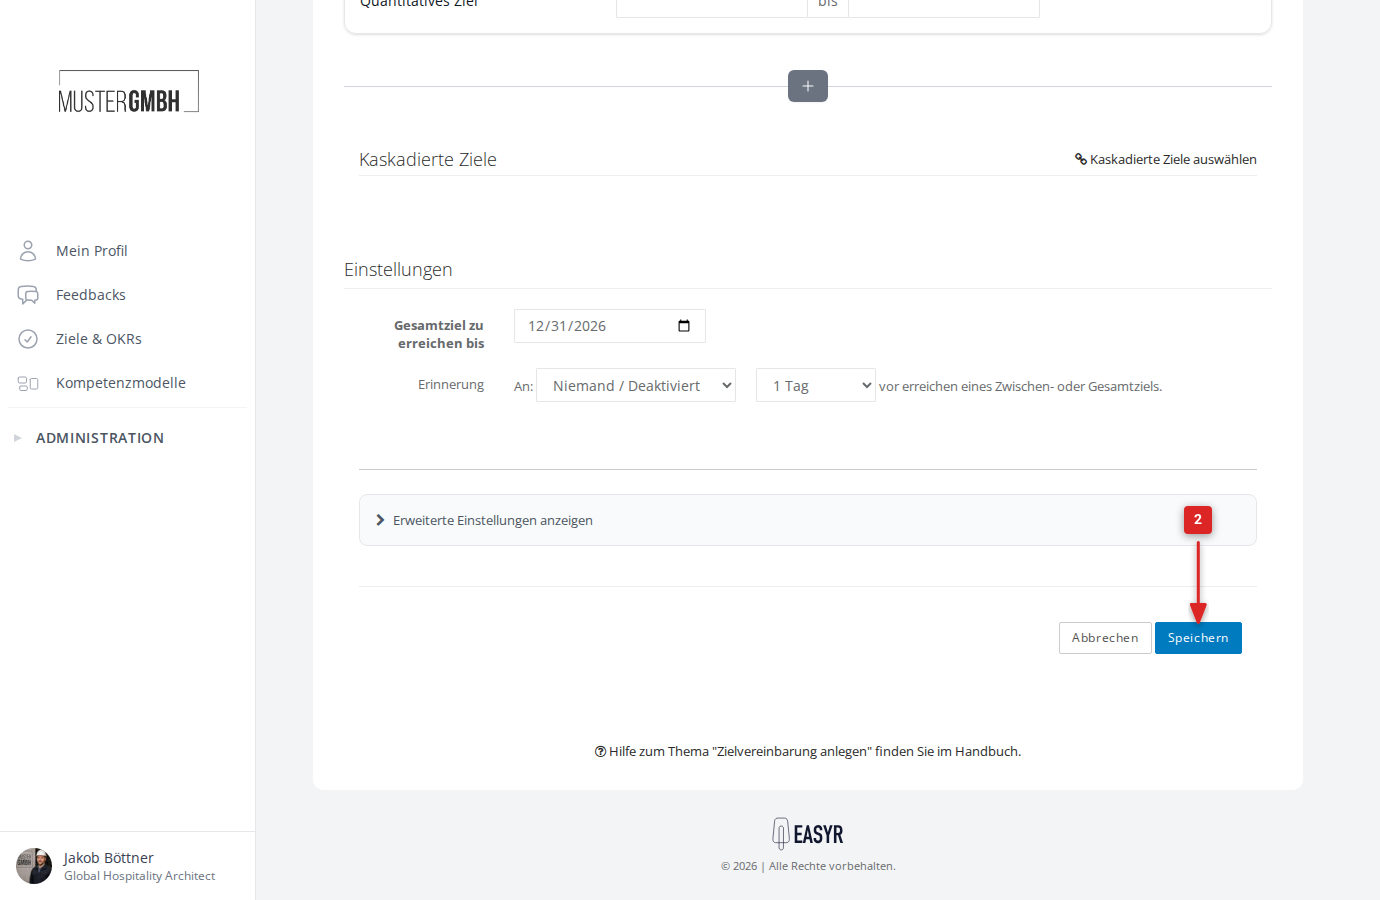
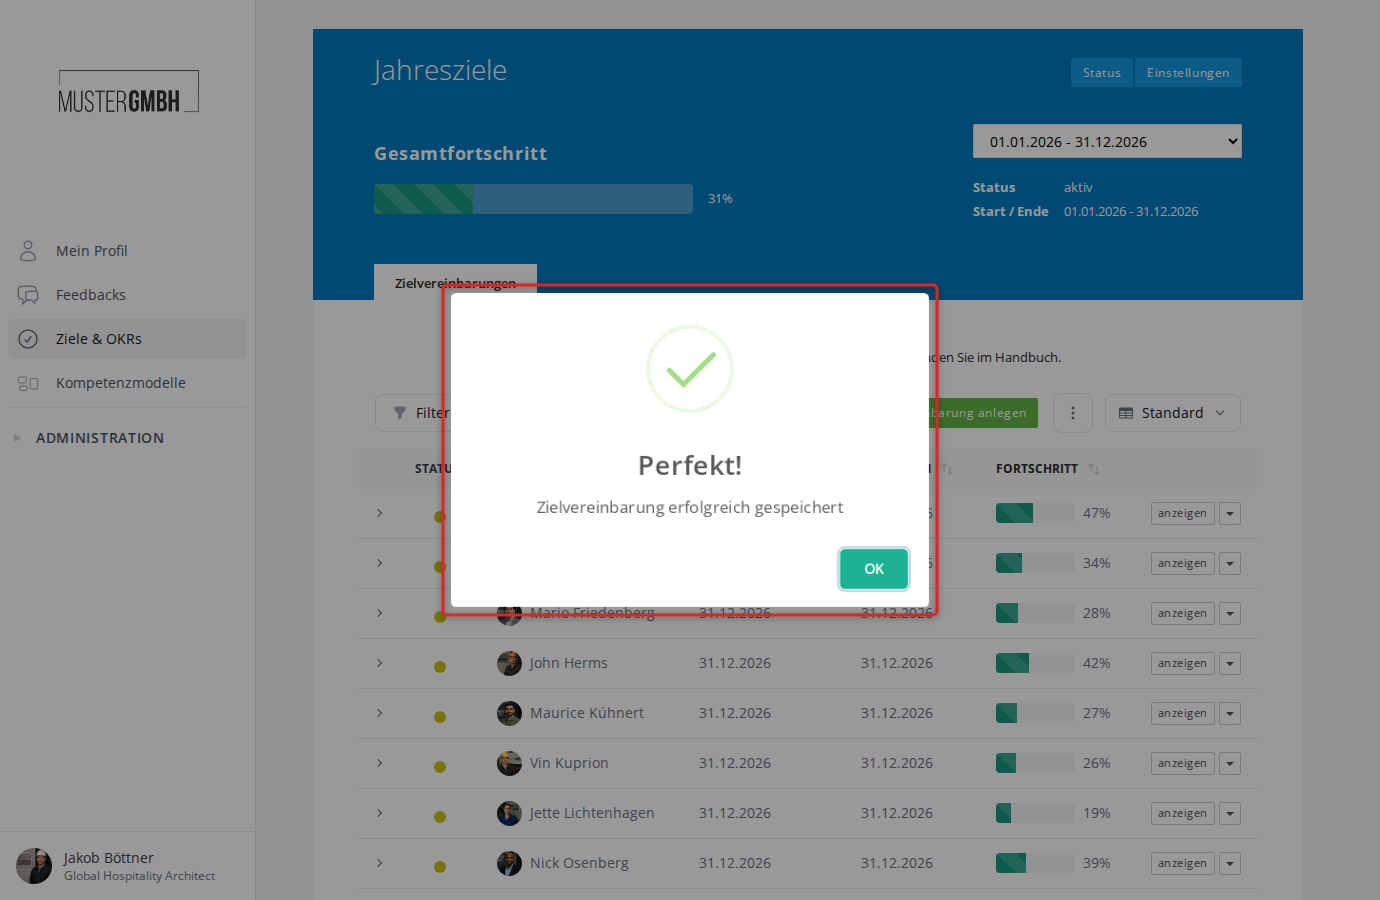
- After a successful save, easyreview shows a confirmation and takes you straight to the detail view of the new target agreement.